
Machinist tools are a variety of products that are used to shape, cut, grind, shear, and form metal into a desired part. They are essential for metalworking and machining, which are the processes of creating metal products or components by removing metal chips in the workpiece. Machinist tools can be operated in different ways, depending on the model. They may be manually operated, or powered electronically, pneumatically, or hydraulically.
Machinist tools can be divided into several main categories and types, such as measuring tools, hand tools, precision tools, clamp set, inspection tools, and more. Each category and type of machinist tool has its own function and application, and requires different skills and techniques to use. Some machinist tools are used to measure the dimensions, angles, and surface quality of workpieces, such as calipers, micrometers, and indicators. Some machinist tools are used to manipulate, fasten, cut, or shape workpieces, such as hammers, wrenches, pliers, and files. Some machinist tools are used to create holes, threads, or other features on workpieces, such as drills, taps, dies, and end mills. Some machinist tools are used to secure workpieces on machines or tables, such as clamps, bolts, nuts, and washers. Some machinist tools are used to check the quality, accuracy, and defects of workpieces, such as magnifiers, microscopes, cameras, and probes.
The purpose and scope of this article is to introduce the basic machinist tools, their functions and applications, and the best sources to buy them. This article will help you understand and master the basic principles and techniques of engineering drawing, and improve your metalworking and machining quality and efficiency. In this article, you will learn:
• What are measuring tools and how to use them
• What are hand tools and how to use them
• What are precision tools and how to use them
• What is clamp set and how to use it
• What are inspection tools and how to use them
Measuring tools are machinist tools that are used to measure the dimensions, angles, and surface quality of workpieces. They are essential for machinist work, as they ensure the accuracy, precision, and consistency of the workpieces. Measuring tools can be classified into different types, such as calipers, micrometers, rulers, gauges, indicators, and more. Each type of measuring tool has its own function and application, and requires different skills and techniques to use.

Calipers are measuring tools that are used to measure the distance between two opposite sides of a workpiece, such as the length, width, height, diameter, or depth. Calipers can be divided into two main types, such as vernier calipers and digital calipers. Vernier calipers are calipers that have a scale and a vernier, which are used to read the measurement by aligning the marks on the scale and the vernier. Digital calipers are calipers that have a display and a sensor, which are used to read the measurement by showing the value on the display.
• Choose the appropriate type and size of calipers for your workpiece, such as vernier calipers or digital calipers, and calipers with a range of 150mm or 300mm.
• Zero the calipers by closing the jaws and adjusting the scale or the display to zero, or by pressing the zero button on the display.
• Open the jaws and place them on the workpiece, such as on the outer or inner diameter, or on the depth or height of the workpiece.
• Close the jaws and make sure they are in contact with the workpiece, but not too tight or too loose, as this may affect the accuracy of the measurement.
• Read the measurement by reading the marks on the scale and the vernier, or by reading the value on the display, and record the measurement with the appropriate unit, such as mm or inch.
• Choose calipers that are suitable for your workpiece and your measurement needs, such as the type, size, range, resolution, and accuracy of the calipers.
• Use calipers with care and caution, as they are delicate and sensitive instruments, and avoid dropping, hitting, or bending them, as this may damage or deform them.
• Maintain calipers regularly and properly, such as cleaning, lubricating, and calibrating them, and storing them in a dry and safe place, such as in a case or a box.

Micrometers are measuring tools that are used to measure the small distances or thicknesses of a workpiece, such as the diameter, depth, or width of a workpiece. Micrometers can be divided into different types, such as outside micrometers, inside micrometers, depth micrometers, and more. Outside micrometers are micrometers that have a frame, an anvil, a spindle, a sleeve, and a thimble, which are used to measure the outside diameter or thickness of a workpiece. Inside micrometers are micrometers that have a frame, a rod, a nut, a sleeve, and a thimble, which are used to measure the inside diameter or width of a workpiece. Depth micrometers are micrometers that have a base, a rod, a sleeve, and a thimble, which are used to measure the depth or height of a workpiece.
• Choose the appropriate type and size of micrometers for your workpiece, such as outside micrometers, inside micrometers, or depth micrometers, and micrometers with a range of 0-25mm, 25-50mm, or 50-75mm.
• Zero the micrometers by bringing the anvil and the spindle, or the rod and the nut, or the base and the rod together, and adjusting the sleeve and the thimble to zero, or by using a standard gauge or a reference workpiece to calibrate the micrometers.
• Open the micrometers and place them on the workpiece, such as on the outer or inner diameter, or on the depth or height of the workpiece.
• Close the micrometers and make sure they are in contact with the workpiece, but not too tight or too loose, as this may affect the accuracy of the measurement.
• Read the measurement by reading the marks on the sleeve and the thimble, and record the measurement with the appropriate unit, such as mm or inch.
• Choose micrometers that are suitable for your workpiece and your measurement needs, such as the type, size, range, resolution, and accuracy of the micrometers.
• Use micrometers with care and caution, as they are delicate and sensitive instruments, and avoid dropping, hitting, or bending them, as this may damage or deform them.
• Maintain micrometers regularly and properly, such as cleaning, lubricating, and calibrating them, and storing them in a dry and safe place, such as in a case or a box.
Hand tools are machinist tools that are used to manipulate, fasten, cut, or shape workpieces. They are useful for machinist work, as they can perform various tasks that are not possible or convenient with machines or power tools. Hand tools can be classified into different types, such as hammers, wrenches, pliers, screwdrivers, files, and more. Each type of hand tool has its own function and application, and requires different skills and techniques to use.

Hammers are hand tools that are used to strike, drive, or remove nails, pins, rivets, or other fasteners from workpieces. Hammers can be divided into different types, such as claw hammers, ball-peen hammers, sledge hammers, and more. Claw hammers are hammers that have a flat face and a curved claw, which are used to drive or pull nails. Ball-peen hammers are hammers that have a flat face and a round peen, which are used to shape or peen metal. Sledge hammers are hammers that have a large and heavy head, which are used to break or demolish metal.
• Choose the appropriate type and size of hammers for your workpiece, such as claw hammers, ball-peen hammers, or sledge hammers, and hammers with a weight of 0.5kg, 1kg, or 2kg.
• Hold the hammer by the handle and grip it firmly, but not too tightly, as this may affect the control and balance of the hammer.
• Swing the hammer by raising your arm and bending your elbow, and aim the hammer at the target, such as the nail, pin, rivet, or metal.
• Strike the hammer by extending your arm and releasing your elbow, and hit the target with the face or the peen of the hammer, and apply the appropriate force and speed, depending on the hardness and thickness of the target.
• Repeat the hammering until the desired result is achieved, such as driving or removing the fastener, or shaping or breaking the metal.
• Choose hammers that are suitable for your workpiece and your hammering needs, such as the type, size, weight, shape, and material of the hammers.
• Use hammers with care and caution, as they are powerful and dangerous tools, and avoid hitting yourself, others, or the wrong target, as this may cause injury or damage.
• Maintain hammers regularly and properly, such as cleaning, oiling, and sharpening them, and storing them in a dry and safe place, such as in a toolbox or a rack.

Wrenches are hand tools that are used to tighten or loosen nuts, bolts, screws, or other fasteners from workpieces. Wrenches can be divided into different types, such as open-end wrenches, box-end wrenches, adjustable wrenches, and more. Open-end wrenches are wrenches that have a U-shaped opening at one or both ends, which are used to fit on the flats of the fastener. Box-end wrenches are wrenches that have a closed ring at one or both ends, which are used to fit on the hexagonal or square head of the fastener. Adjustable wrenches are wrenches that have a movable jaw that can be adjusted to fit on different sizes of fasteners.
• Choose the appropriate type and size of wrenches for your workpiece, such as open-end wrenches, box-end wrenches, or adjustable wrenches, and wrenches with a size of 10mm, 15mm, or 20mm.
• Hold the wrench by the handle and grip it firmly, but not too tightly, as this may affect the control and balance of the wrench.
• Place the wrench on the fastener, such as the nut, bolt, screw, or other fastener, and make sure the wrench fits snugly and securely on the fastener, and does not slip or strip the fastener.
• Turn the wrench by rotating your wrist and arm, and apply the appropriate force and direction, depending on the tightness and orientation of the fastener. To tighten the fastener, turn the wrench clockwise, and to loosen the fastener, turn the wrench counterclockwise.
• Repeat the turning until the desired result is achieved, such as tightening or loosening the fastener, or removing or installing the fastener.
• Choose wrenches that are suitable for your workpiece and your fastening needs, such as the type, size, shape, and material of the wrenches.
• Use wrenches with care and caution, as they are forceful and hazardous tools, and avoid over-tightening, under-tightening, or cross-threading the fastener, as this may cause damage or failure of the fastener or the workpiece.
• Maintain wrenches regularly and properly, such as cleaning, oiling, and calibrating them, and storing them in a dry and safe place, such as in a toolbox or a rack.
Precision tools are machinist tools that are used to create holes, threads, or other features on workpieces. They are important for machinist work, as they can produce accurate, precise, and consistent results that are not possible or convenient with hand tools or power tools. Precision tools can be classified into different types, such as drills, taps, dies, reamers, end mills, and more. Each type of precision tool has its own function and application, and requires different skills and techniques to use.

Drills are precision tools that are used to create round holes on workpieces. Drills can be divided into different types, such as twist drills, spade drills, center drills, and more. Twist drills are drills that have a spiral groove along the body, which are used to create general-purpose holes. Spade drills are drills that have a flat blade at the end, which are used to create large-diameter holes. Center drills are drills that have a short and rigid body, which are used to create center holes for lathe work.
• Choose the appropriate type and size of drills for your workpiece, such as twist drills, spade drills, or center drills, and drills with a diameter of 1mm, 5mm, or 10mm.
• Mount the drill on the drill chuck or the drill holder, and tighten the drill securely, but not too tightly, as this may affect the performance and life of the drill.
• Mark the location of the hole on the workpiece, and center-punch the mark to create a small indentation, which will help guide the drill and prevent it from wandering.
• Align the drill with the mark on the workpiece, and adjust the speed and feed of the drill, depending on the material and hardness of the workpiece. To drill faster, use a higher speed and a lower feed, and to drill smoother, use a lower speed and a higher feed.
• Start the drill and apply a steady and moderate pressure on the drill, and drill through the workpiece, or to the desired depth of the hole. To prevent the drill from overheating or breaking, withdraw the drill periodically and clear the chips, and use a cutting fluid or a coolant to lubricate and cool the drill and the workpiece.
• Stop the drill and remove the drill from the workpiece, and inspect the hole for the size, shape, and quality, and deburr the hole if necessary.
• Choose drills that are suitable for your workpiece and your drilling needs, such as the type, size, shape, and material of the drills.
• Use drills with care and caution, as they are sharp and dangerous tools, and avoid drilling too fast, too deep, or too hard, as this may cause the drill to overheat, break, or jam.
• Maintain drills regularly and properly, such as cleaning, oiling, and sharpening them, and storing them in a dry and safe place, such as in a case or a box.

Taps are precision tools that are used to create internal threads on workpieces. Taps can be divided into different types, such as taper taps, plug taps, bottoming taps, and more. Taper taps are taps that have a tapered end, which are used to start the thread. Plug taps are taps that have a slightly tapered end, which are used to continue the thread. Bottoming taps are taps that have a flat end, which are used to finish the thread.
• Choose the appropriate type and size of taps for your workpiece, such as taper taps, plug taps, or bottoming taps, and taps with a thread size of M3, M6, or M10.
• Mount the tap on the tap wrench or the tap holder, and tighten the tap securely, but not too tightly, as this may affect the performance and life of the tap.
• Drill a hole on the workpiece with a drill that has a slightly smaller diameter than the tap, and deburr the hole if necessary.
• Align the tap with the hole on the workpiece, and adjust the speed and feed of the tap, depending on the material and hardness of the workpiece. To tap faster, use a higher speed and a lower feed, and to tap smoother, use a lower speed and a higher feed.
• Start the tap and apply a steady and moderate pressure on the tap, and tap into the workpiece, or to the desired depth of the thread. To prevent the tap from overheating or breaking, reverse the tap periodically and clear the chips, and use a cutting fluid or a coolant to lubricate and cool the tap and the workpiece.
• Stop the tap and remove the tap from the workpiece, and inspect the thread for the size, shape, and quality, and clean the thread if necessary.
• Choose taps that are suitable for your workpiece and your tapping needs, such as the type, size, shape, and material of the taps.
• Use taps with care and caution, as they are sharp and dangerous tools, and avoid tapping too fast, too deep, or too hard, as this may cause the tap to overheat, break, or jam.
• Maintain taps regularly and properly, such as cleaning, oiling, and sharpening them, and storing them in a dry and safe place, such as in a case or a box.
Clamp set is a machinist tool that is used to secure workpieces on machines or tables. It is necessary for machinist work, as it can prevent the workpieces from moving, slipping, or vibrating during the machining process. Clamp set can be composed of different components, such as clamps, bolts, nuts, washers, studs, and more. Each component of clamp set has its own function and application, and requires different skills and techniques to use.

Clamps are clamp set components that are used to hold or press workpieces against a surface, such as a machine table or a vise. Clamps can be divided into different types, such as C-clamps, F-clamps, toggle clamps, and more. C-clamps are clamps that have a C-shaped frame, a screw, and a swivel pad, which are used to clamp workpieces with a wide range of thicknesses. F-clamps are clamps that have an F-shaped frame, a screw, and a sliding jaw, which are used to clamp workpieces with a long range of lengths. Toggle clamps are clamps that have a lever, a link, and a clamping arm, which are used to clamp workpieces with a quick and easy action.
• Choose the appropriate type and size of clamps for your workpiece, such as C-clamps, F-clamps, or toggle clamps, and clamps with a capacity of 50mm, 100mm, or 150mm.
• Place the clamp on the workpiece and the surface, such as the machine table or the vise, and make sure the clamp is aligned and stable, and does not interfere with the machining process.
• Tighten the clamp by turning the screw or the lever, and apply the appropriate force and pressure, depending on the hardness and shape of the workpiece. To clamp the workpiece securely, use a sufficient number and variety of clamps, and distribute them evenly and symmetrically on the workpiece and the surface.
• Loosen the clamp by reversing the screw or the lever, and remove the clamp from the workpiece and the surface, and inspect the workpiece for the quality and accuracy, and clean the workpiece if necessary.
• Choose clamps that are suitable for your workpiece and your clamping needs, such as the type, size, capacity, shape, and material of the clamps.
• Use clamps with care and caution, as they are forceful and hazardous tools, and avoid over-clamping, under-clamping, or mis-clamping the workpiece, as this may cause damage or failure of the workpiece or the clamp.
• Maintain clamps regularly and properly, such as cleaning, oiling, and adjusting them, and storing them in a dry and safe place, such as in a toolbox or a rack.

Bolts, nuts, washers, and studs are clamp set components that are used to fasten or join workpieces together, or to attach workpieces to a surface, such as a machine table or a vise. Bolts, nuts, washers, and studs can be classified into different types, such as hex bolts, hex nuts, flat washers, and threaded studs, and more. Hex bolts are bolts that have a hexagonal head, a cylindrical body, and a threaded end, which are used to fasten workpieces with a nut or a threaded hole. Hex nuts are nuts that have a hexagonal shape, a threaded hole, and a flat face, which are used to fasten workpieces with a bolt or a stud. Flat washers are washers that have a flat and round shape, a hole in the center, and a smooth surface, which are used to distribute the load and prevent the bolt or the nut from loosening or damaging the workpiece. Threaded studs are studs that have a cylindrical body, a threaded end, and a plain end, which are used to fasten workpieces with a nut or a threaded hole.
• Choose the appropriate type and size of bolts, nuts, washers, and studs for your workpiece, such as hex bolts, hex nuts, flat washers, and threaded studs, and bolts, nuts, washers, and studs with a diameter of 5mm, 10mm, or 15mm.
• Drill or tap a hole on the workpiece or the surface, such as the machine table or the vise, and make sure the hole is aligned and compatible with the bolt or the stud, and deburr the hole if necessary.
• Insert the bolt or the stud into the hole, and place a washer on the bolt or the stud, and make sure the bolt or the stud is flush and secure with the workpiece or the surface.
• Screw the nut on the bolt or the stud, and place a washer on the nut, and tighten the nut by turning it clockwise, and apply the appropriate force and torque, depending on the hardness and shape of the workpiece. To fasten the workpiece securely, use a sufficient number and variety of bolts, nuts, washers, and studs, and distribute them evenly and symmetrically on the workpiece and the surface.
• Unscrew the nut from the bolt or the stud, and remove the washer from the nut, and loosen the nut by turning it counterclockwise, and remove the bolt or the stud from the hole, and remove the washer from the bolt or the stud, and inspect the workpiece for the quality and accuracy, and clean the workpiece if necessary.
• Choose bolts, nuts, washers, and studs that are suitable for your workpiece and your fastening needs, such as the type, size, shape, and material of the bolts, nuts, washers, and studs.
• Use bolts, nuts, washers, and studs with care and caution, as they are forceful and hazardous tools, and avoid over-fastening, under-fastening, or cross-threading the workpiece, as this may cause damage or failure of the workpiece or the bolt, nut, washer, or stud.
• Maintain bolts, nuts, washers, and studs regularly and properly, such as cleaning, oiling, and calibrating them, and storing them in a dry and safe place, such as in a toolbox or a rack.
This article provides a detailed overview of the definition, categorization, uses, and purchasing methods of machinist's tools. Machinist's tools cover all types of products needed to process metal, including measuring tools, hand tools, precision tools, fixtures, inspection tools, and more. Each category of tools has unique functions and application scenarios, and therefore requires different skills and methods when using them. The article introduces common machinist's tools, such as calipers, hammers, drills, thread cutters, clamps, bolts, nuts, washers, studs, etc. in detail, including their use steps, precautions and maintenance methods. It aims to help readers understand and master the basic principles and techniques of machinist's tools so as to improve the quality and efficiency of metal working. In addition, Richconn's CNC machining services are highly recommended for projects that require custom machining. We provide professional custom machining solutions and are committed to high quality, precision machining to meet your individual needs.
 How to Use a Five Axis Machining Center to Process Titanium Alloy Shaped PartsMarch 24, 2023As a five-axis machining center engineer, I will share with you the methods of machining titanium alloy special-shaped parts using a five-axis machining center, as well as the key points of titanium a...view
 Machining process of connecting rod partsNovember 16, 2023Connecting rod parts play a vital role in the mechanical field and are commonly used in engines, vehicle drivelines, industrial machinery and other applications. In order to ensure their accuracy, reliability and performance, the manufacture of connecting rod parts needs to go through several machining processes.view
 Brass vs Bronze vs Pure Copper vs Copper Alloys: An in-depth look at their differencesSeptember 26, 2023The comparison of brass to bronze to copper and its copper alloys is crucial as these metals can be easily confused. In addition, the distinction between these materials is also very subtle. As a result, development engineers or designers can be seriously confused when it comes to material selection. In particular, the similarity of these metal constituent elements makes it more difficult to classify and select them.view
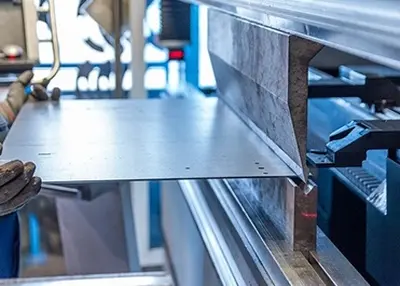 5 Bending and Forming Methods for Sheet MetalDecember 4, 2023Sheet metal refers to a process used to manufacture a variety of metal products, which involves processing sheet metal into the desired shape and size by cutting, stamping, bending, and welding.view
 Top 12 CNC Machining Manufacturers in the USAJune 8, 2024Looking for reliable CNC machining parts manufacturers in the USA? Check out our list of the top 12 companies, each with its own unique advantages and processing capacities. Find the perfect partner for your business today!view
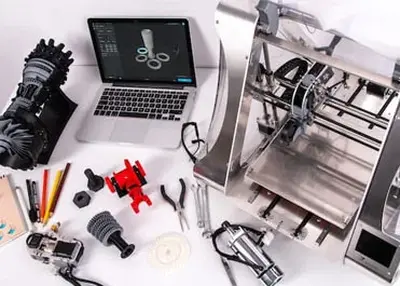 How Much Do 3D Prints Cost: An In-Depth Guide to ExpensesAugust 15, 20233D printing has revolutionized manufacturing and design, allowing individuals and businesses to create intricate and customized objects with unprecedented ease. However, one common question that arise...view
 EN
EN
 ru
ru 


