
A countersink is a conical hole that is typically drilled or milled into a material, such as wood, metal, or plastic, to allow the head of a screw or fastener to sit flush with or below the surface of the material. The purpose of a countersink is to create a space for the screw's head so that it doesn't protrude above the surface, which can improve the appearance, safety, and functionality of the workpiece.
Here's how a countersink works:
Drilling: First, a pilot hole is typically drilled into the material. This pilot hole is the same size as the core diameter of the screw. It helps guide the screw into the material.
Countersinking: After the pilot hole is drilled, a countersink bit or tool is used to create the conical recess around the pilot hole. This countersink bit has a cutting edge that creates the angled recess as it drills into the material. The angle of the countersink bit corresponds to the angle of the screw's head, which is typically 82 degrees or 90 degrees.
Fastening: With the countersunk hole in place, the screw can be driven into the material. The head of the screw will sit flush with or below the surface of the material, providing a smooth finish.
Countersinking is commonly used in woodworking, metalworking, and various construction and assembly applications. It helps prevent the screw or fastener from sticking out, reducing the risk of injury and ensuring a neat, finished appearance.

The purpose of a countersink is multifaceted, and its importance extends across various industries and applications. Below, I will detail the primary purposes and benefits of countersinking, highlighting its significance:
Flush Surface Finish: One of the primary purposes of countersinking is to achieve a flush surface finish. By creating a conical recess for the screw or fastener's head, the countersink allows the fastener to sit level with or below the material's surface. This creates a smooth and even finish, enhancing the aesthetics of the workpiece.
Safety: Countersinking helps improve safety. When screws or fasteners protrude above the surface, they can pose hazards, such as snagging clothing, causing injuries, or damaging adjacent objects. Countersinking eliminates these risks by ensuring that the fastener doesn't extend beyond the material's surface.
Enhanced Strength: In some applications, countersinking can enhance the strength and stability of the joint or connection. By allowing the screw or bolt to sit flush, it distributes the load more evenly across the material, reducing stress concentrations that could weaken the joint.
Reduced Splitting: In woodworking, countersinking is crucial for preventing wood from splitting when screws are driven in. Without a countersink, the force applied when driving a screw can cause the wood to crack or split, compromising the integrity of the structure.
Improved Fastener Seating: Countersinking ensures that the fastener's head seats securely in the material. This prevents the fastener from wobbling or loosening over time, leading to more reliable and durable connections.
Screw Head Protection: Countersinking protects the head of the screw or fastener from damage. When a fastener is flush with or below the surface, it is less likely to be damaged by external forces or impacts.
Cosmetic Appeal: Countersinking is often used for aesthetic purposes. In woodworking, cabinetry, and furniture making, for example, it provides a clean and professional appearance by concealing the fasteners.
Countersunk Holes for Plug Installation: Countersunk holes can be used for installing plugs or caps. After fastening, a plug can be inserted into the countersunk hole, providing a completely hidden and finished look.
Compatibility: Countersinking ensures that the correct type of fastener can be used for a specific application. Different screws and bolts have various head shapes and angles, and countersinking allows for precise matching.
Assembly Efficiency: In manufacturing and assembly processes, countersinking can expedite the fastening process. The fasteners can be driven quickly and securely without the need for additional finishing steps.
Reduced Corrosion Risk: Countersinking can help protect the fastener's head from exposure to moisture, reducing the risk of corrosion or rust formation.

Countersinking is a machining operation used to create a conical or beveled recess in a material to accommodate the head of a screw, bolt, or fastener. It is a fundamental technique used in various industries, including woodworking, metalworking, construction, and manufacturing. To achieve effective countersinking, there are general rules and guidelines that should be followed.
1. Select the Right Countersink Tool:
Choose a countersink tool (also known as a countersink bit or cutter) that matches the type and size of the fastener you plan to use. Different fasteners have various head shapes and angles, so selecting the appropriate tool is crucial for a proper fit.
2. Determine the Countersink Angle:
The countersink angle should match the angle of the fastener's head. The two most common countersink angles are 82 degrees and 90 degrees. It's important to ensure that the countersink angle matches the fastener to achieve a flush fit.
3. Mark the Fastener Locations:
Before beginning the countersinking process, mark the locations where you intend to fasten materials. Use a pencil, marking gauge, or other suitable marking tools to create clear reference points.
4. Pilot Hole Preparation:
In most cases, it is advisable to drill a pilot hole before countersinking. The size of the pilot hole should match the core diameter of the fastener (the diameter of the shank excluding the threads). A properly sized pilot hole helps guide the fastener and ensures accurate placement.
5. Depth Calculation:
Determine the depth to which you want the fastener head to sit below or flush with the material's surface. This depth should be consistent for all countersinks in a given project or assembly.
6. Adjust the Countersink Depth:
Set the depth stop on your countersink tool to match the desired depth. Some countersink tools have adjustable depth stops, allowing for precise control over the depth of the recess.
7. Secure the Workpiece:
Ensure that the workpiece is securely clamped or held in place to prevent movement during the countersinking process. This helps maintain accuracy and safety.
8. Perform the Countersinking Operation:
Insert the countersink tool into a suitable power drill or drill press chuck.
Position the countersink tool over the marked location for the fastener.
Start the drill or press and gently lower the countersink tool into the material.
Apply steady and even pressure as you create the countersink recess. Avoid excessive force, which can lead to chatter or damage to the material.
9. Check Depth and Angle:
Periodically stop the countersinking operation to check the depth and angle of the recess. Use a depth gauge or the fastener itself to ensure that the countersink matches the desired specifications.
10. Deburr and Clean: - After countersinking, remove any burrs or rough edges from the recessed area. This can be done using a deburring tool or sandpaper. Clean the area to remove any debris or shavings.
11. Test Fastener Fit: - Before inserting the fastener, test its fit in the countersink to ensure that it sits flush or slightly below the material's surface.
12. Repeat as Needed: - Repeat the countersinking process for all marked fastener locations in your project or assembly.
13. Install Fasteners: - Insert the screws, bolts, or fasteners into the countersunk holes and fasten them securely. Be careful not to overtighten, as this can damage the material or strip the threads.
14. Final Inspection: - Conduct a final inspection to ensure that all fasteners are properly seated, flush with or slightly below the material's surface, and secure.
15. Consider Material Specifics: - Different materials may require adjustments in countersinking techniques. For example, hardwoods and softwoods may behave differently, so be prepared to adapt your approach based on the material you are working with.
16. Safety Precautions: - Always observe safety precautions, including wearing appropriate safety gear such as eye protection and hearing protection, especially when using power tools.

Whether you should countersink before or after drilling depends on the specific project, the material you are working with, and your overall approach to fastening. Both methods have their advantages and are used in different situations.
Countersinking Before Drilling:
Advantages:
Precise Alignment: When you countersink before drilling, you have precise control over the placement and alignment of the fastener. You can ensure that the fastener will be centered and positioned exactly where you want it.
Minimized Material Splintering: In woodworking, countersinking before drilling can help reduce the likelihood of splintering or tearing out the wood fibers around the hole. This is especially important when working with delicate or hardwoods.
Visual Aesthetics: Countersinking first allows you to achieve a clean and finished look immediately, as the fastener head is concealed right from the start.
Process:
Mark the Fastener Locations: Begin by marking the locations where you want to place the fasteners on the workpiece.
Countersink First: Use a countersink tool or bit to create the recesses at the marked locations. This recess should accommodate the head of the fastener.
Drill Pilot Holes: After countersinking, drill pilot holes into the material at the same locations. The size of the pilot hole should match the core diameter of the fastener.
Fasten: Insert the screws or fasteners into the countersunk holes and fasten them securely.
Countersinking After Drilling:
Advantages:
Efficiency: Countersinking after drilling can be more efficient in some situations, especially when you have a large number of holes to drill. It eliminates the need to change between a drill bit and a countersink bit repeatedly.
Versatility: When countersinking after drilling, you can choose to countersink only the holes that require it, leaving some holes without countersinks if desired.
Uniform Depth: If you're working with materials of varying thicknesses, countersinking after drilling allows you to adjust the depth of the countersink to match each material thickness precisely.
Process:
Mark the Fastener Locations: Start by marking the locations where you want to place the fasteners on the workpiece.
Drill Pilot Holes: Use a drill bit to create pilot holes at the marked locations. The size of the pilot hole should match the core diameter of the fastener.
Countersink: After drilling the pilot holes, switch to a countersink bit or tool and countersink each hole to the desired depth. Be careful not to remove too much material; aim for a recess that accommodates the fastener head.
Fasten: Insert the screws or fasteners into the countersunk holes and fasten them securely.
Factors Influencing the Decision:
Material Type: Some materials, like hardwoods, may benefit from countersinking before drilling to minimize splintering, while others, like metal, may be more easily countersunk after drilling.
Project Complexity: For projects with precise alignment requirements or where aesthetics are crucial, countersinking before drilling may be the preferred method.
Tool Availability: Consider the availability of suitable countersinking and drilling tools. If you have access to both types of tools and the material allows for it, you can choose the method that best suits your needs.
Efficiency vs. Precision: Countersinking after drilling can be more efficient when dealing with a large number of holes, but countersinking before drilling offers more precision in terms of fastener placement.
Countersinks and counterbores are both machining operations used to create recesses in materials, typically to accommodate fasteners like screws, bolts, or dowels. While they share similarities, they serve different purposes and have distinct characteristics.
Purpose:
A countersink is primarily used to create a conical or beveled recess at the opening of a hole. The purpose is to allow the head of a screw or fastener to sit flush with or below the material's surface. Countersinks are often used for aesthetic reasons and to prevent protruding fastener heads, which could pose safety risks or affect the overall appearance of a workpiece.
Shape:
The recess created by a countersink is typically conical, forming an angled depression that matches the profile of the fastener head.
Angle:
Countersinks are available in different angles, with the most common angles being 82 degrees and 90 degrees. The choice of angle should match the angle of the fastener head for a flush fit.
Depth:
The depth of a countersink is relatively shallow, designed to accommodate only the head of the fastener. It does not extend deep into the material.
Typical Use Cases:
Countersinking is commonly used in woodworking, metalworking, and construction for creating clean and flush fastener installations. It is also employed for aesthetic purposes in cabinetry, furniture making, and other crafts.
Tools:
Countersinking is typically performed using countersink bits or countersink cutters. These tools are designed to create the conical recess.
Purpose:
A counterbore, on the other hand, is used to create a cylindrical recess or pocket in a material. This recess is often wider and deeper than a countersink and serves various purposes beyond accommodating fastener heads. Counterbores are commonly used to allow bolts, nuts, or other hardware to be recessed into the material.
Shape:
The recess created by a counterbore is cylindrical, with a flat bottom. It does not taper like a countersink.
Depth:
Counterbores are typically deeper than countersinks, and their depth can vary depending on the specific application and the length of the fastener or hardware being used.
Typical Use Cases:
Counterbores are frequently used in construction, engineering, and manufacturing when it is necessary to recess fasteners, such as bolts or nuts, into a material's surface. This creates a flush or below-surface finish while allowing for a secure and stable connection.
Tools:
Counterbores are created using counterbore bits or counterbore cutters. These tools are designed to cut cylindrical recesses with flat bottoms.
Shape: The primary difference between countersinks and counterbores is the shape of the recess they create. Countersinks produce conical recesses, while counterbores create cylindrical recesses with flat bottoms.
Purpose: Countersinks are mainly used to accommodate the heads of screws or fasteners and provide a flush or aesthetic finish. Counterbores are used to recess fasteners like bolts or nuts and provide a secure, flush, or below-surface connection.
Depth: Counterbores are generally deeper than countersinks and can vary in depth depending on the application.
Typical Use Cases: Countersinks are commonly found in woodworking, metalworking, and construction for flush fastener installations. Counterbores are prevalent in structural engineering, manufacturing, and any application where recessed fasteners are needed.
Richconn is a well-known manufacturing and machining services company with CNC (computer numerical control) machining services as one of its specialties. CNC machining is an advanced manufacturing technology that utilizes computer-controlled machine tools to precisely cut and form parts to meet various customer needs.
Richconn's expertise in CNC machining makes it an expert in providing high quality, precision machined parts. Here are some features and benefits about Richconn as a CNC machining services expert:
Highly automated: Richconn's CNC machining equipment uses highly automated technology to provide a highly consistent and precise machining process. This ensures that every part meets strict specifications and quality standards.
Diversity: Richconn is able to handle a variety of materials, including metals (such as aluminum, steel, stainless steel), plastics and composites. This diversity allows them to meet the needs of different industries and applications.
Customization: As an expert in CNC machining, Richconn is able to develop customized machining plans based on customers' designs and specifications. They can produce parts from small to large batches.
High Precision and Quality Control: Richconn attaches great importance to precision and quality control. Their equipment and processes allow very precise dimensions and surface quality to be achieved to meet the most demanding requirements.
Fast Delivery: As a professional CNC machining service provider, Richconn is usually able to provide fast delivery to meet customers' schedule requirements.
Engineering Support: They typically have experienced engineering teams who can work with customers to optimize designs to improve production efficiency and quality.
Cost Effectiveness: Through a highly automated CNC machining process, Richconn is able to offer competitive prices while maintaining high quality standards.
As an expert in CNC machining services, Richconn adheres to its commitment to high quality, high precision and high customization, providing customers in various industries with high-quality part manufacturing and processing solutions. Whether it is automotive, aerospace, medical equipment, electronics or other fields, they can meet the needs of their customers and help them achieve project success. If you need CNC machining services, Richconn can be a reliable partner.
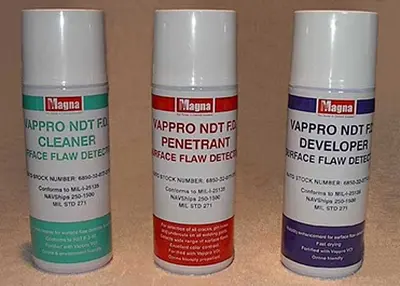 What Does Color Flaw Detection Mean?October 19, 2023Color flaw detection is a method of non-destructive testing, it is a surface inspection method, mainly used to detect such as the naked eye can not identify the cracks and other surface damage, such as the detection of stainless steel material near the surface defects (cracks), porosity, porosity, delamination, unwelded and unfused and other defects (also known as PT detection).view
 Some Knowledge You Need to Learn About Tapped HoleNovember 16, 2023Do you need taped holes? This article covers the factors you must consider to manufacture the tapped hole during the process.view
 Three Things You Need to Know About CNC Machining in the Energy IndustryOctober 25, 2023Before the Industrial Revolution, human beings didn't have much need for energy. For example, we were happy to use the sun's energy to heat our homes, horses for transportation, wind power to sail around the world, and water to power simple machines that ground grain.17 In the 1980s, everything changed with the rapid growth of steam-powered electric power plants, most of whose components were manufactured using high-speed machine tools.view
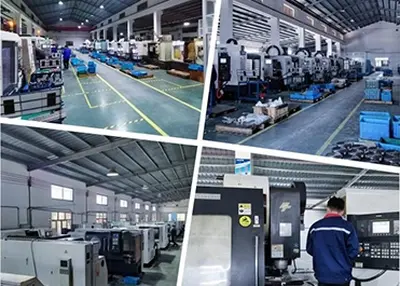 How long does it take to CNC machine a simple part?November 1, 2023CNC machining, as an important process in the modern manufacturing field, has been widely used in various industries to realize the manufacturing of precision parts through the intelligent control of computers. In the manufacturing process, the complexity of the part has a great impact on the machining time. In this paper, we will discuss the time required for CNC machining from the perspective of simple geometry to highly complex structures, and analyze in depth the influence of geometry, machining process and related parameters on machining time.view
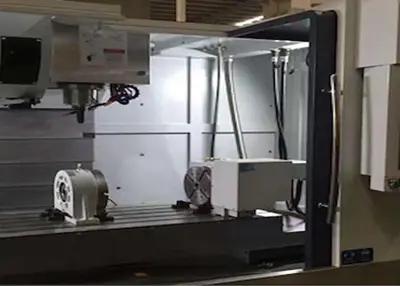 CNC Machining Technology and ProcessJuly 27, 2023CNC Machining TechnologyCNC machining technology mainly includes CNC machine tool machining technology and CNC machine tool programming technology. CNC machine tool machining technology directly compl...view
 Unlocking Precision: Mastering Cylindricity for Engineering ExcellenceNovember 21, 2023In the intricate world of engineering, precision reigns supreme. Enter the realm of cylindricity - a fundamental attribute dictating the perfection of cylindrical forms. Here, I guide you through an explorative journey, unveiling the essence of cylindricity, its nuanced applications in GD&T (Geometric Dimensioning and Tolerancing), and the crucial methods to measure and comprehend this vital parameter.view
 EN
EN
 ru
ru 


 3D Printing Service")